How To Rearrange Clips In Instagram Reels
Rearrange Clips in Instagram Reels - The new Instagram Reels feature has taken the social media world by storm, offering a fun and engaging way to share short videos. With the ability to record and edit multiple clips, users can create impressive videos that tell a story or showcase a talent. However, organizing the order of the clips can be tricky. In this blog post, we'll guide you through the simple steps to rearrange clips in Instagram Reels, giving you more control over the final product.
Rearrange Clips In Instagram Reels: 7 Steps
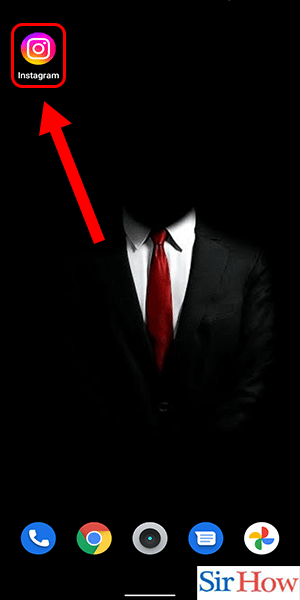
Step 1: Open Instagram app - The first step to rearrange clips in Instagram Reels is to open the Instagram app. Make sure you have the latest version of the Instagram app installed on your device.
- If you are using an older version, update your app to access all the new features and tools.
- Make sure you have a stable internet connection to avoid any inconvenience while using the app.
Step 2: Swipe right - Once you open the app, swipe right to access the camera. You will be redirected to the Instagram camera screen.
- Make sure you allow Instagram to access your camera and microphone to start recording.
- You can also add filters, music, and effects to your Instagram Reels to make it more engaging.

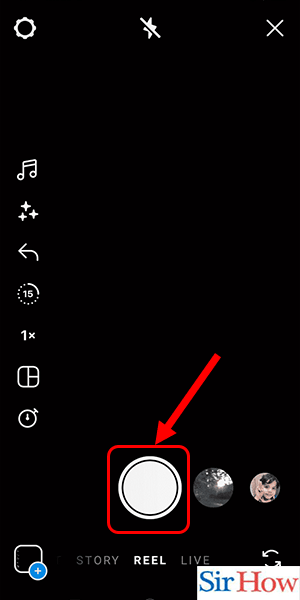
Step 3: Tap and hold to create a reel - To create a new Instagram Reel, tap and hold the record button. You can record up to 15 seconds of content, and Instagram will automatically stitch the clips together.
- Try to keep your videos short and to the point to grab the viewers' attention.
- Use a tripod or a stabilizer to keep your videos steady.
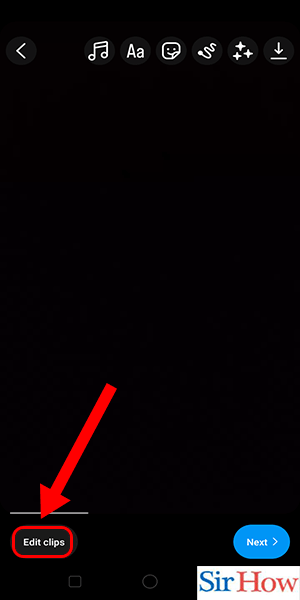
Step 4: Click on 'edit clips' - Once you finish recording, you will be redirected to the editing screen. Click on ‘Edit Clips’ at the bottom of the screen to access the editing tools.
- Make sure you record multiple clips to create engaging content for your viewers.
- Edit your clips to add transitions, text, and stickers to make them more engaging.
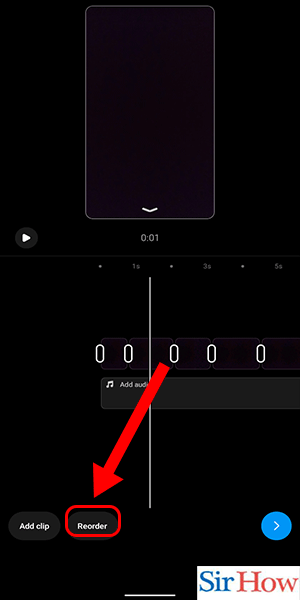
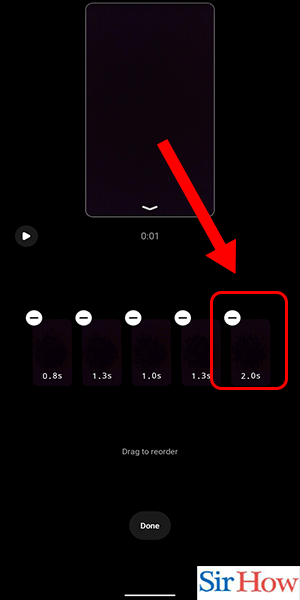
Step 5: Click on 'reorder' - Once you click on ‘Edit Clips,’ you will see all your recorded clips in a sequence. Click on ‘Reorder’ to rearrange your clips as per your preference.
- Plan your content beforehand to rearrange your clips quickly.
- Make sure you know the story you want to tell through your Instagram Reels.
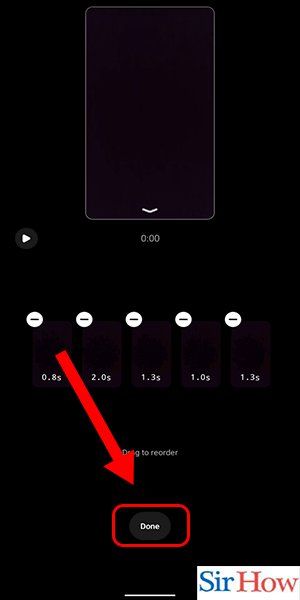
Step 6: Drag the clip to reorder - To rearrange the clips, drag and drop them as per your preference. You can move them up or down to change the sequence.
- Try different combinations to see which arrangement works best for your content.
- Use the preview feature to see how your Instagram Reels will look after rearranging the clips.
Step 7: Click on 'done' - Once you have rearranged all your clips, click on ‘Done’ to save the changes. You can now preview your Instagram Reels and share them with your followers.
- Make sure you watch your Instagram Reels before sharing them with your followers.
- Share your Instagram Reels at the right time to get maximum engagement.
Rearranging clips in Instagram Reels is a simple and effective way to make your content more engaging and visually appealing. By following the above steps, you can quickly rearrange your clips and create stunning Instagram Reels that tell your story. Experiment with different combinations and share your content with your followers to get maximum engagement.
Tips
- Make sure your clips are in a logical order to make your Reel flow smoothly.
- Use the ‘reorder’ feature to play around with different clip orders until you find the perfect one.
- Don’t be afraid to experiment with different clip orders and see what works best for you and your content.
FAQ
Can I rearrange my Reel after I have published it?
No, you cannot rearrange your Reel after it has been published.
Can I add new clips to my Reel after it has been published?
No, you cannot add new clips to your Reel after it has been published.
Can I delete clips from my Reel after it has been published?
No, you cannot delete clips from your Reel after it has been published.
Can I rearrange the order of clips in a Reel I have saved as a draft?
Yes, you can rearrange the order of clips in a Reel you have saved as a draft.
How many clips can I include in a single Reel?
You can include up to 30 clips in a single Reel.
Can I use clips from other users in my Reel?
Yes, you can use clips from other users in your Reel as long as you have their permission to do so.
Can I change the cover image for my Reel?
Yes, you can change the cover image for your Reel by selecting the ‘Cover’ option when you are editing your Reel.