How to Enable DNS Over HTTPS on Windows 11
To enable DNS over HTTPS, you will have to choose two pairs of DNS servers. One pair for IPv4 and the other for IPv6. Here is a list of available DNS addresses for IPv6 and IPv4:
IPv4:
- Google DNS Primary: 8.8.8.8
- Google DNS Secondary: 8.8.4.4
- Cloudflare DNS Primary: 1.1.1.1
- Cloudflare DNS Secondary: 1.0.0.1
- Quad9 DNS Primary: 9.9.9.9
- Quad9 DNS Secondary: 149.112.112.112
IPv6:
- Google DNS Primary: 2001:4860:4860::8888
- Google DNS Secondary: 2001:4860:4860::8844
- Cloudflare DNS Primary: 2606:4700:4700::1111
- Cloudflare DNS Secondary: 2606:4700:4700::1001
- Quad9 DNS Primary: 2620:fe::fe
- Quad9 DNS Secondary: 2620:fe::fe:9
You will need these details for the section below. So, keep them in front of you when you follow the enabling section below.
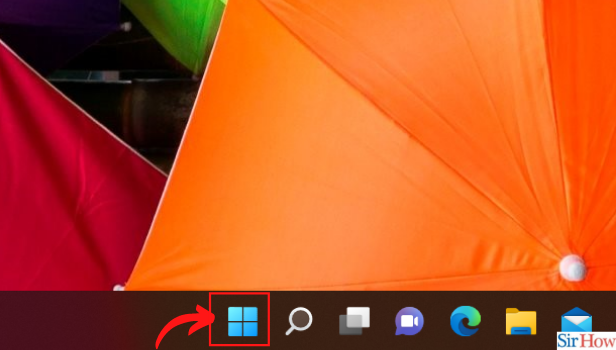
Step 1: Click on the Windows icon on the taskbar
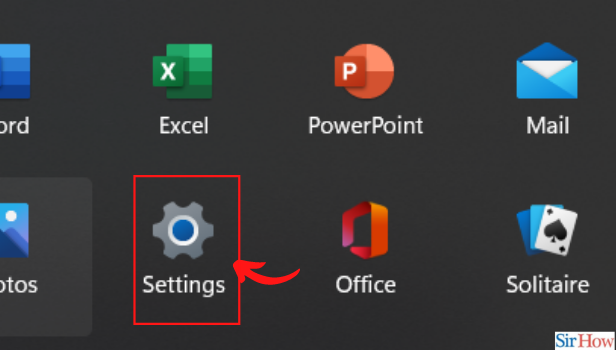
Step 2: Choose ‘Settings’ option or Open the Settings app using the shortcut “Win+I”.
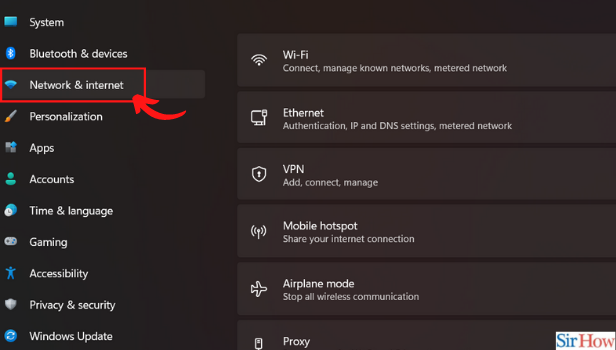
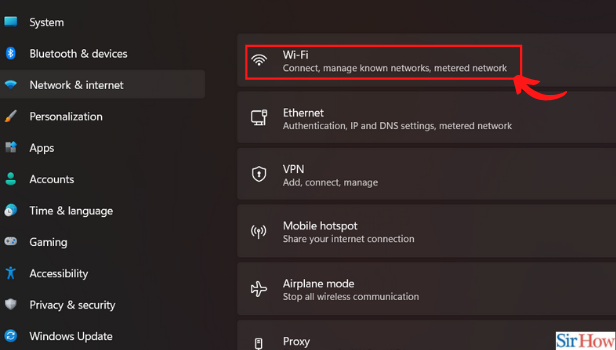
Step 3: Go to the Network & Internet section from the left sidebar.
Step 4: Select the Wifi option from the right pane.
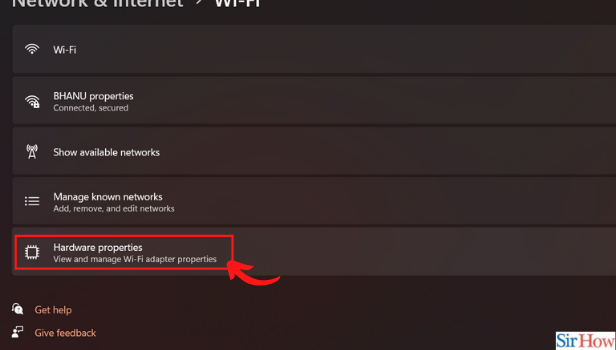
Step 5: Select Hardware properties.
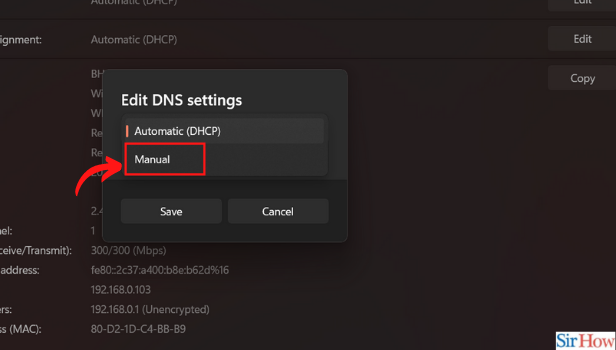
Step 6: Locate the DNS Server Assignment option and click on Edit.

Step 7: Select Manual from the drop-down menu.
Step 8: Turn the toggle switch On next to IPv4.
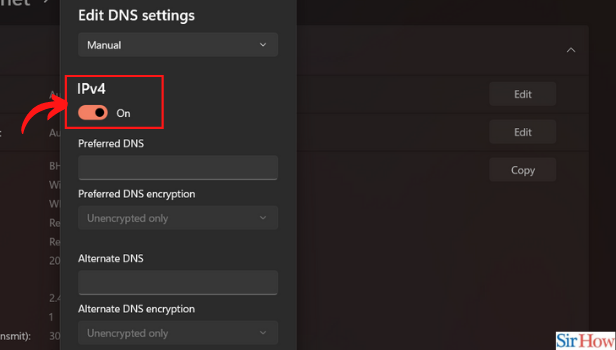
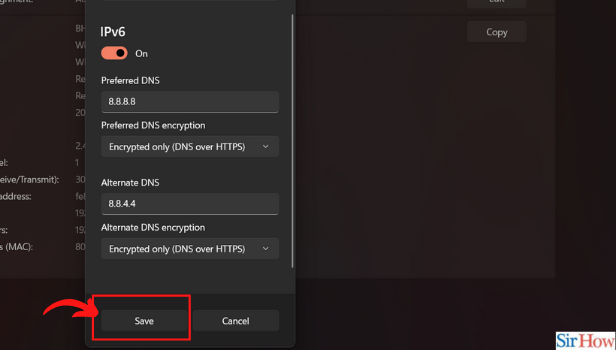
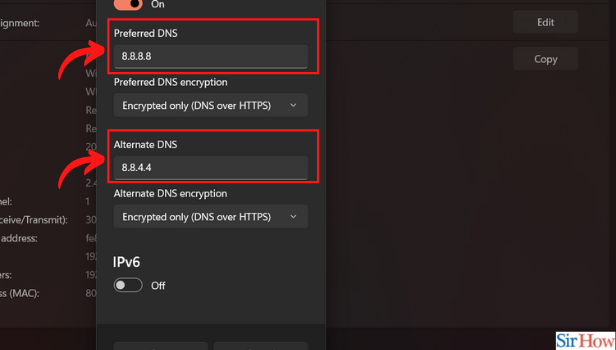
Step 9: Once you turn the toggle switch On, you will see a bunch of new options. In the Preferred DNS and Alternate DNS, pick a primary and secondary pair from the section above. For example, you can add 8.8.8.8 in Preferred and 8.8.4.4 in Alternate DNS.
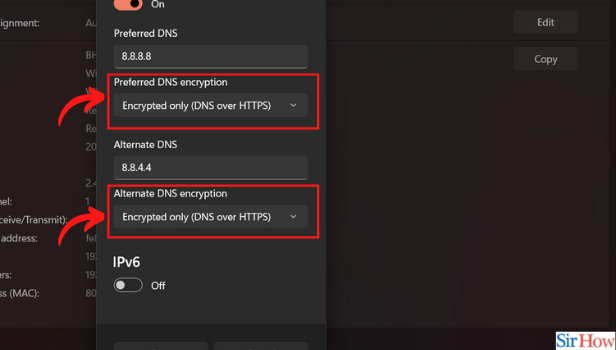
Step 10: From the drop-down menu under Preferred DNS encryption and Alternate DNS encryption, select Encrypted only (DNS over HTTPS)
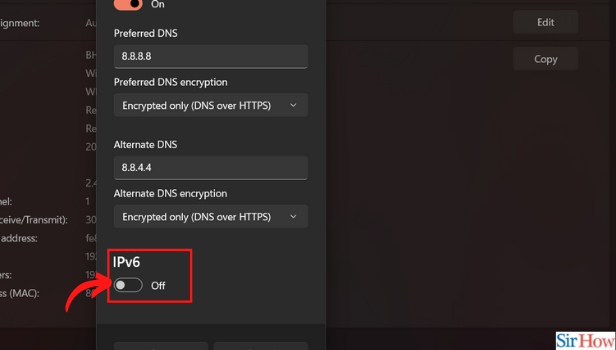
Step 11: Now, turn the toggle switch On for IPv6.
Step 12: Follow steps 8 and 9 for IPv6. In step-8, add the DNS server details given for IPv6 in the section above.
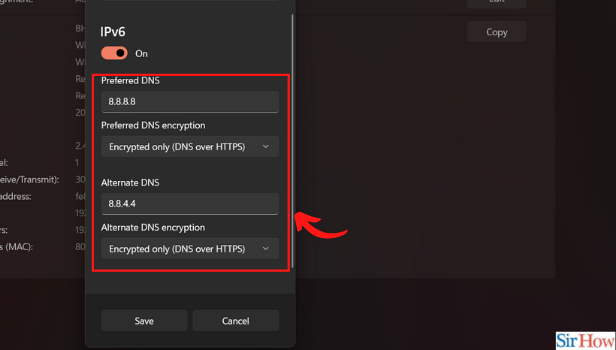
Step 13: After you are done with both IPv4 and IPv6, select Save.