How to manage Uploads in canva
Management is a very important task. Whether the management is of people or work. Managing and organizing the Uploads in the canva app can be very tiresome work if you do not follow the right steps. Manage Uploads in the canva app is easy and simple to understand.
You can learn the process in 10 short steps. Along with that, you should also know how to share your folders with teams in canva. It will surely help you in the long run.
Meanwhile, learn to manage Uploads in the canva app with the steps written in the article below.
How to upload content to folders in Canva
Manage Uploads in Canva App in 10 Easy Steps
Step-1 Open Canva App: The initial and the easiest step is to open the Canva app. You can do this on both your mobile and your desktop. There is no restriction on any version of the app.

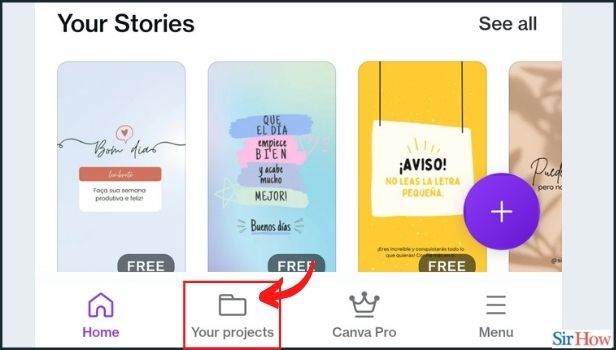
Step-2 Tap on 'Your Projects': From the home screen, tap on 'Your projects'. This option is available at the bottom bar of the screen. A small folder shape represents this option.
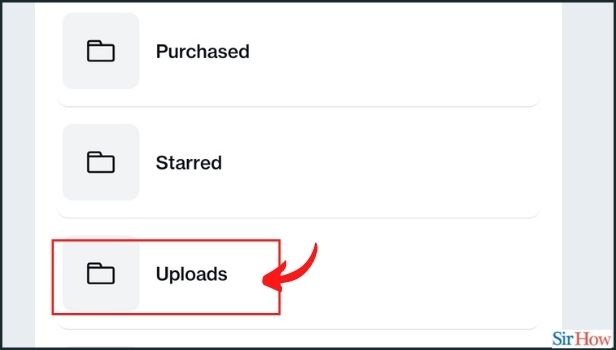
Step-3 Tap on 'Uploads': From the 'You Projects' folder, click on the 'Uploads' tab. There are other options also. Like purchased and starred.
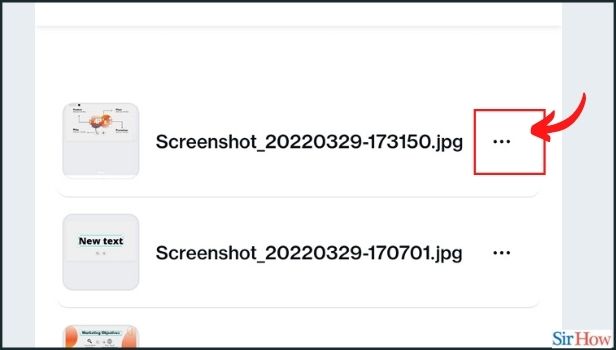
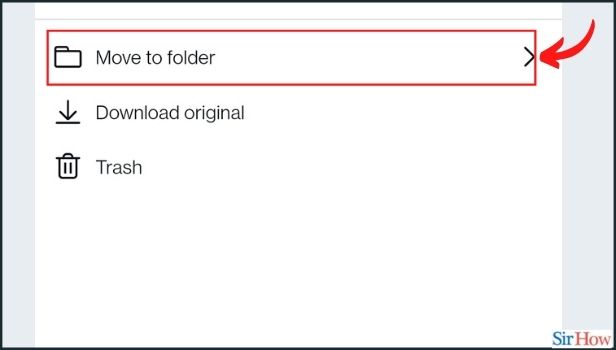
Step-4 Tap on the '•••' button: Tap the ••• icon on the media file you want to manage. These three dots are present just beside the name of the file.
You will see these three dots when you click or hover your mouse on the file name.
Step-5 Click on 'Trash': To delete, select 'Trash'. It is a way to manage the extra and unnecessary files and designs.
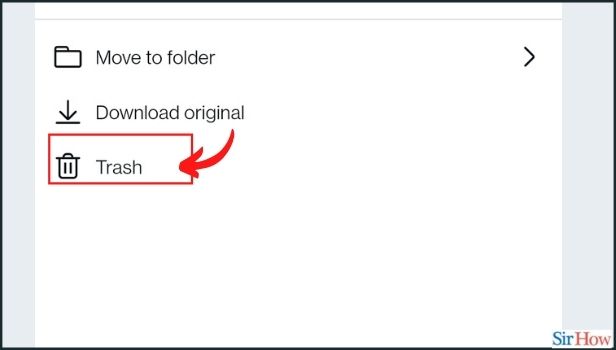
Step-6 To download, select Download original: This option will download the original copy of the file for you. After downloading, you can see the file in the gallery of your device. It is a very simple option. And, it is very useful too.
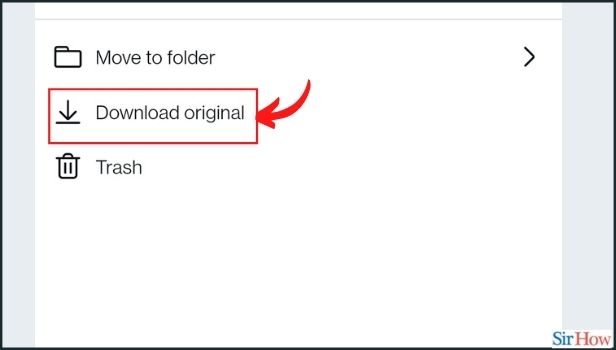
Step-7 Click on 'Move to folder': This option serves another purpose. To move the file to another folder, click on the 'move to folder' button.
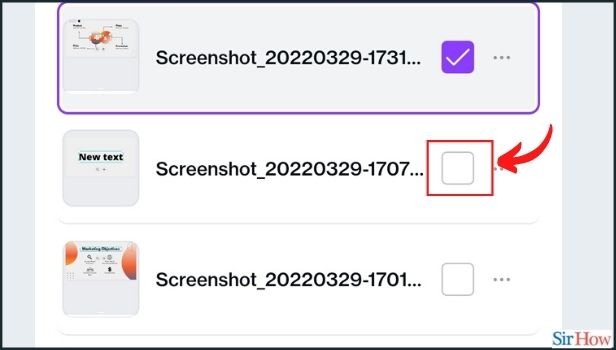
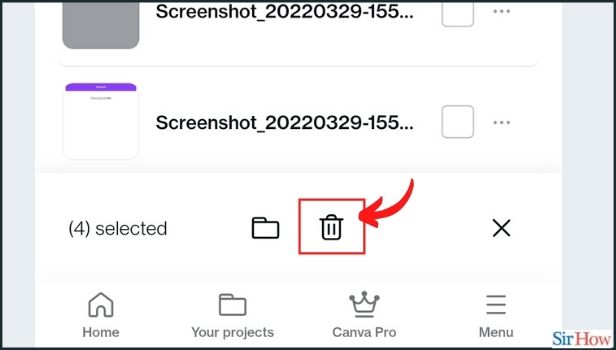
Step-8 Delete files in bulk: Sometimes, there may be many extra files. You may wish to delete them in bulk instead of one by one. This is possible.
To do bulk delete, long press on the file and it will get selected. You can just single click on other files to select them. It saves so much time.
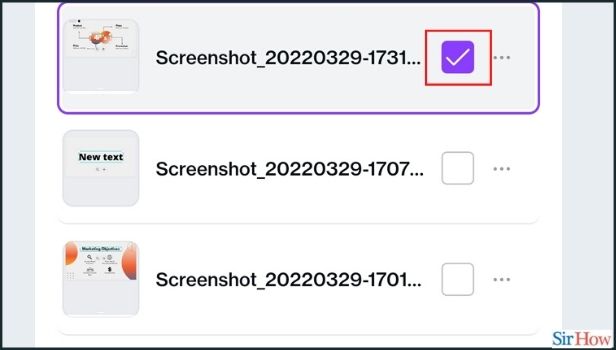
Step-9 Single click on other files you want to delete: Select other files by tapping the checkboxes that appear on the design thumbnails.
Step-10 Click on the 'trash' or 'delete' icon: Tap the trash icon at the bottom of the screen to delete them.
Can We Delete A Very Large Number of Files in One Go?
Yes, you can delete a big number of files in just a few clicks. You can read about this process in the last 3 steps of the article above. It is very easy and it saves a large chunk of time. Also, you can restore them in 30 days.
Is It Possible To Get Paytm Bank Account Statement on the Paytm App?
Sometimes you may wish you get the Paytm Bank Account Statement for several reasons. The reasons like managing your expenditure or for other possible reasons. Also, Paytm allows you to get a bank statement. This is not a very hectic or big process. Also, you can do this in a few easy steps.
How to Restore the files that we have deleted in the past?
You can restore the files that you have so far. Canva allows you to do this. This is a very simple and easy process. But, note that you can only restore them in the next 30 days. Also, Canva automatically deletes them after 30 days. Canva does this to save space in the app.