- iPhone
- change instagram name iphone
- access saved videos
- change download quality
- enable captions youtube
- sign out youtube
- access downloaded videos
- play youtube video
- save google drive video
- upload video google drive
- download pdf iphone
- scan documents google drive
- delete multiple files
- add google drive iphone
- download google drive iphone
- automatically upload photos
- access google drive iphone
- save iphone contacts
- add photos google drive
- backup whatsapp chat
- delete folder google drive
- download zip files
- export contacts iphone
- increase playback speed
- enable dark mode
- hide whatsapp profile
- untag person facebook
- find your facebook
- delete facebook messages
- copy facebook post
- save picture facebook
- screen share messenger
- give access photos
- send voice message
- unsilence calls iphone
- loop video iphone
- delete instagram account
- download music youtube
- unsave posts facebook
- download google drive iphone
- download google drive files
- upload photos google drive
- download google drive video
- delete files google drive
- download photos google drive
- transfer music google drive
- allow google drive access
- attach google drive file
- clear google drive storage
- create folder google drive
- delete pdf google drive
- delete photos google drive
- delete shared files
- download audio google drive
- download folder google drive
- download large files
- find google drive iphone
- install google drive iphone
- listen google drive audio
- logout google drive iphone
- open google drive link
- play google drive audio
- print from google drive
- share google drive folder
- share google drive link
- access sheets file
- edit files google drive
- give someone access
- grant access google drive
- login google drive iphone
- move video google drive
- retrieve deleted whatsapp
- unarchive whatsapp chat
- add contact whatsapp
- clear whatsapp cache
- stop whatsapp saving photos
- transfer whatsapp messages
- read whatsapp messages
- make sticker whatsapp
- pin whatsapp chat
- clip youtube videos
- clear youtube watch
- open transcript youtube
- parental control youtube
- change youtube video quality
- get youtube music iphone
- chang youtube language
- make youtube video
- speed up video
- turn off autoplay videos
- turn off playback videos
- make apple maps 3d
- get apple maps
- change apple maps
- remove pin apple maps
- turn off voice
- makegif iphone
- set timer iphone
- share notes iphone
- delete conversation iphone
- find ip address
- change icons iphone
- shorten video iphone
- sign document iphone
- use siri iphone
- change alarm volume
- change lock screen iphone
- change screen timeout
- crop video iphone
- delete hidden apps
- play wordle iphone
- remove screen record
- turn off data
- check storage iphone
- empty trash iphone
- find hidden photos
- find saved passwords
- convert .heic .jpg
- inver colors iphone
- turn off sleep mode
- make keyboard bigger
- turn off flash
- find words safari
- play 8 ball iphone
- take bursts iphone
- rotate screen iphone
- reverse video iphone
- make text italics
- turn background refresh
- change card iphone
- draw photo iphone
- remove favorites safari
- silence contact phone
- view apps alphabetical
- slow down video
- minimize youtube iphone
- turn auto caps iphone
- blocksnapchat iphone
- compress photos iphone
- mark e mails unread
- boomerang snapchat iphone
- clear scan history
- add photos snapchat
- snapchat back home screen
- convert pdf epub iphone
- attach file gmail app
- add gmail account
- avoid roads google maps
- print an e mail iphone
- minimize google maps iphone
- change home address
- enter coordinates google maps
- get road view google maps
- open address google maps
- avoid highways google maps
- add photos google
- 3d google maps iphone
- reinstall google maps
- tilt google maps iphone
- zoom google maps
- start google maps
- share wi fi iphone
- volume maps iphone
- nearby google maps iphone
- help maps iphone
- how to turn off incognito mode in iphone
- turn read receipts iphone
- auto lock on iphone
- screen record iphone 13
- unblock number iphone
- sign google maps iphone
- google maps history iphone
- change driving mode iphone
- transportation google maps iphone
- multiple pins maps iphone
- mac address iphone
- edit video iphone
- print message iphone
- change language iphone
- find parking maps iphone
- measure distance maps iphone
- share route maps iphone
- get directions maps iphone
- focus mode iphone
- flashlight on iphone
- set up hotspot iphone
- restaurants maps iphone
- live location maps iphone
- motorways maps iphone
- enable location access iphone
- save location maps iphone
- audio google maps iphone
- maps spanish iphone
- adjust volume apple maps
- get traffic maps iphone
- disable google maps iphone
- change iphone passcode
- change time iphone
- conference call iphone
- text on iphone
- record conversation iphone
- delete album iphone
- battery percentage iphone 13
- make group chat iphone
- keep maps open iphone
- street view maps iphone
- recover photos iphone
- share album iphone
- delete messages iphone
- delete multiple contacts iphone
- scan documents iphone
- account maps iphone
- sharing maps iphone
- distance apple maps
- see maps search history
- work location apple maps
- street view apple maps
- apple maps search history
- eta apple maps
- pin apple maps
- check apple maps
- maps voice australian
- enter coordinates apple maps
- apple maps walking
- stop apple maps
- change google maps iphone
- review google maps iphone
- convert pdf iphone
- disable pop ups iphone
- blocked numbers iphone
- make collage on iphone
- keyboard whatsapp iphone
- shared eta iphone
- browser cache iphone
- highways apple maps
- tolls apple maps
- voice apple maps
- directions apple maps
- reinstall apple maps iphone
- multiple stops apple maps
- block pop ups iphone
- block number iphone
- home screen iphone
- location maps on iphone
- bookmark on iphone
- block websites iphone
- block e mails iphone
- access files iphone
- change iphone name
- silence notifications iphone
- reset settings on iphone
- alarm sound iphone
- more storage iphone
- get avoid highways
- speed google maps iphone
- maps whatsapp iphone
- remove pin maps iphone
- howhighways maps iphone
- apple voice female
- add device iphone
- words iphone dictionary
- add widgets iphone
- directions send iphone
- snooze on iphone
- screenshot iphone 13
- update whatsapp iphone
- download whatsapp iphone
- coordinates apple maps
- delete apple maps
- lock whatsapp iphone
- labels maps iphone
- connect spotify iphone
- saved google maps iphone
- zoom maps iphone
- parking maps iphone
- contact maps iphone
- email maps iphone
- north maps iphone
- screenshot maps iphone
- maps dark mode
- install apple maps
- tilt apple maps
- download google maps iphone
- saving whatsapp iphone
- contacts whatsapp iphone
- qr whatsapp iphone
- unarchive whatsapp iphone
- block whatsapp iphone
- receipts whatsapp iphone
- location whatsapp iphone
- uninstall whatsapp iphone
- delete instagram iphone
- profile instagram iphone
- location instagram iphone
- time maps iphone
- home maps iphone
- friends instagram iphone
- instagram live iphone
- links instagram stories iphone
- stop youtube iphone
- view youtube iphone
- untag instagram iphone
- maps offline iphone
- change map iphone
- kilometres maps on the iphone
- delete maps history iphone
- latitude maps iphone
- drop pin maps iphone
- search route maps iphone
- uninstall maps iphone
- icon maps iphone
- sites connection iphone
- youtube thumbnail iphone
- subscribe youtube channel iphone
- watch videos offline iphone
- deactivate instagram iphone
- instagram account iphone
- instagram questions iphone
- instagram polls iphone
- instagram group iphone
- gif instagram iphone
- coordinate maps iphone
- adjust volume maps iphone
- your youtube channel iphone
- message youtube iphone
- youtube autoplay iphone
- youtube browser iphone
- message instagram iphone
- instagram search history iphone
- instagram filters iphone
- edit instagram photos iphone
- edit instagram bio iphone
- duration youtube iphone
- reminders youtube iphone
- download youtube videos iphone
- download instagram stories iphone
- install instagram app iphone
- delete instagram story iphone
- instagram photos iphone
- instagram videos iphone
- instagram page iphone
- instagram stories on iphone
- tag instagram post iphone
- language youtube iphone
- thumbnail youtube iphone
- controls youtube iphone
- theme youtube iphone
- recent searches iphone
- age youtube iphone
- content youtube iphone
- delete playlist youtube iphone
- list youtube iphone
- youtube playing iphone
- youtube data iphone
- restrict youtube iphone
- quality youtube iphone
- check update iphone
- auto wi fi iphone
- fill pdf iphone
- profile picture iphone
- share videos iphone
- subscribers youtube iphone
- live youtube iphone
- creator account iphone
- instagram posts iphone
- videos instagram iphone
- instagram groups iphone
- blocked instagram iphone
- delete youtube video iphone
- instagram password iphone
- repost instagram iphone
- instagram stories camera iphone
- logout devices instagram iphone
- verify account iphone
- enter coordinates iphone
- alternate maps iphone
- find maps iphone
- instagram video iphone
- logout instagram iphone
- followers instagram iphone
- maps satellite iphone
- miles maps iphone
- address maps iphone
- favorites maps iphone
- delete google maps iphone
- traffic maps iphone
- delete maps iphone
- pin maps iphone
- post instagram iphone
- instagram stories iphone
- notifications on iphone
- instagram on iphone
- members on iphone
- history on iphone
- instagram post iphone
- stories instagram iphone
- reel on iphone
- upload youtube iphone
- history youtube iphone
- screen youtube iphone
- report channel iphone
- time youtube iphone
- playlist youtube iphone
- viewers youtube iphone
- playback speed iphone
- delete youtube iphone
- block channel youtube iphone
- data youtube iphone
- youtube recommendations iphone
- video link iphone
- video quality iphone
- comments youtube iphone
- short youtube iphone
- youtube black iphone
- youtube channel iphone
- youtube videos iphone
- disable comments iphone
- video private iphone
- comment youtube iphone
- videos offline iphone
- zoom on iphone
- data snapchat iphone
- remove snapchat iphone
- share maps iphone
- destinations maps iphone
- history snapchat iphone
- unblock snapchat iphone
- maps iphone
- maps voice iphone
- history google maps iphone
- snapchat notifications in iphone
- zoom iphone
- drag maps iphone
- directions maps iphone
- location maps iphone
- maps talk iphone
- settings maps iphone
- download maps iphone
- street view iphone
- google maps iphone
- mark read iphone
- reset settings iphone
- qr code iphone
- show battery percentage iphone
- alarm on iphone
- hdr on iphone
- call history iphone
- battery percentage iphone
- change brightness iphone
- gmail app in iphone
- rtf to pdf iphone
- rename pdf iphone
- iphone screen youtube
- birthdays snapchat iphone
- videos youtube iphone
- install gmail iphone
- account gmail app iphone
- gmail app iphone
- flip camera iphone
- automatic theme iphone
- create pdf iphone
- encrypt pdf iphone
- copy paste pdf iphone
- delete pages pdf iphone
- make pdf iphone
- merge files iphone
- snapchat video iphone
- snapchat light mode iphone
- remove contacts snapchat iphone
- record snapchat iphone
- text size snapchat iphone
- remove camera snapchat iphone
- snapchat dark mode iphone
- camera snapchat in iphone
- camera snapchat iphone
- conversations snapchat iphone
- emojis snapchat iphone
- activity instagram iphone
- remove friend snapchat iphone
- snapcode page iphone
- copy paste snapchat iphone
- filters snapchat iphone
- snapchat notifications iphone
- instagram story iphone
- instagram accounts iphone
- instagram bio iphone
- sticker snapchat iphone
- shopping history snapchat iphone
- snapchat data iphone
- chat snapchat iphone
- scan snapchat iphone
- snapchat microphone iphone
- snapchat name iphone
- snapchat username iphone
- snapchat videos iphone
- restart snapchat iphone
- update snapchat iphone
- open snapchat iphone
- microphone access snapchat iphone
- camera access snapchat iphone
- gifs snapchat iphone
- delete snapchat iphone
- memories snapchat iphone
- attach pdf iphone
- font size gmail iphone
- chat gmail iphone
- remove gmail iphone
- defaults gmail iphone
- gmail on iphone
- bcc gmail iphone
- gmail app on iphone
- block gmail iphone
- snapchat messages iphone
- cc gmail app iphone
- public profile snapchat
- update gmail app
- log out snapchat
- disable dynamic emails
- enable dynamic emails
- change mobile number gmail
- change your snapchat sound
- monitor snapchat screen time
- hide snapchat iphone
- make public profile snapchat
- hide location snapchat
- prioritize notifications gmail
- gmail app dark mode
- bin folder gmail
- format text gmail
- change mobile signature
- print e mail in gmail
- remove promotions from gmail
- remove social from gmail
- remove forums in gmail
- change notification sound
- turn off promotions
- find spam emails
- view unread emails
- convert excel to pdf
- convert .heic to pdf
- air drop pdf
- open pdf on iphone
- control f in pdf
- convert pdf to png
- convert pdf to word
- download pdf from whatsapp
- convert ppt to pdf
- unlock pdf in iphone
- compress pdf in iphone
- rotate pdf in iphone
- search pdf in iphone
- setup priority inbox
- send email to multiple
- reply to mail gmail
- search mail in gmail
- close gmail app iphone
- empty trash in gmail
- filter unread emails
- find drafts on gmail
- give all photos access
- restrict photo access
- make gmail app default
- mark emails as important
- view important mails
- forward email in gmail
- delete draft in gmail
- download attachments in gmail
- unblock email in gmail
- delete label in gmail
- make gmail app
- change account in gmail
- change profile picture
- add a signature
- add student email
- add yahoo account
- add labels in gmail
- unsubscribe in gmail app
- turn off all notifications
- view separate inboxes
- how to find your youtube channel link on iphone
- find your youtube channel
- delete youtube app
- change youtube profile picture
- turn on dark mode
- install youtube on iphone
- check contacts in google
- turn on mini player
- delete you tube video
- change you tube settings
- add thumbnail on you tube
- upload 4k video
- upload shorts on youtube
- zoom out on video
- loop video on youtube
- customize youtube channel
- create a youtube short
- change age on youtube
- copy youtube video link
- get rid you tube shorts
- pin comment on iphone
- delete drafts on iphone
- refresh instagram on iphone
- turn on vanish mode
- remove a remembered instagram
- make instagram account
- delete instagram photos
- react to instagram message
- add music on instagram
- clear instagram cache
- delete instagram messages
- recover deleted emails
- reset home screen layout
- make the text bold
- make headphones louder
- remove sim card
- inspect element on iphone
- enable grid on camera
- fax from iphone
- see your facebook followers
- delete recent contacts
- turn off night shift
- eject water from iphone
- turn off location
- turn off flashlight iphone
- turn off airplay iphone
- take screenshot on iphone
- turn off focus mode
- turn off hotspot
- take selfie on iphone
- change bluetooth name iphone
- turn off location iphone
- reset keyboard dictionary iphone
- turn off vpn iphone
- add youtube on iphone
- pip youtube on iphone
- delete youtube search iphone
- see comments youtube iphone
- how to get desktop youtube on iphone
- create youtube playlist iphone
- comment youtube video iphone
- play youtube audio iphone
- create youtube channel iphone
- upload video on iphone
- age restriction youtube iphone
- block youtube channel iphone
- clear youtube cache iphone
- add line on iphone
- speed video on iphone
- put multiple images iphone
- reply instagram message iphone
- post instagram on iphone
- instagram password on iphone
- extract audio video iphone
- change yahoo mail iphone
- turn not disturb iphone
- degree symbol on iphone
- rotate screen on iphone
- save slideshow iphone
- reverse video on iphone
- zoom out on iphone
- record iphone home button
- resize image on iphone
- dial numbers extensions iphone
- search specific words iphone
- change hotspot name iphone
- restrict instagram on iphone
- upload album instagram iphone
- drafts instagram on iphone
- resize photo on iphone
- delete instagram on iphone
- change address on iphone
- hide contacts on iphone
- turn off sim iphone
- long screenshot on iphone
- enable mms on iphone
- refresh iphone home button
- add two photos on iphone
- turn off iphone vibrations
- factory reset iphone
- force reset iphone
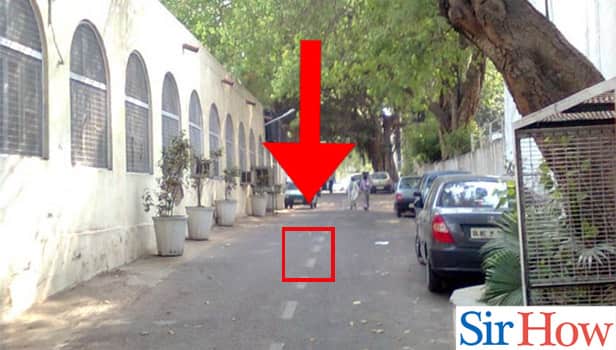
How to Draw on Photo in iPhone
Are you tired of the plain and boring photos on your iPhone? Do you wish there was an easy way to add some personal flair to your pictures? Well, look no further! With the "draw on photo" feature on your iPhone, you can add your own artistic touch to any photo in just a few simple steps. In this blog post, we'll guide you through the process of using this feature and share some tips and tricks to help you make the most of it. So grab your iPhone and let's get creative!
Draw on photo in iPhone in 6 Steps
Step-1 Tap on Photo: Open the Photos app and select the photo you want to edit. Tap on it to open it in full screen.
- You can quickly access your camera roll by swiping up from the bottom of your iPhone screen.
- If you have a large number of photos, use the search bar to find the specific photo you want to edit.
Step-2 Tap Edit: Once you have selected the photo, tap on the "Edit" button located in the top right corner of your screen.
- You can also access the Edit option by tapping and holding the photo thumbnail in your camera roll.
- The Edit button will not be available if the photo is not in your camera roll.

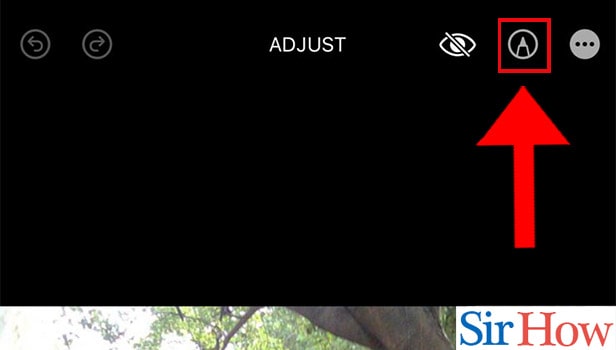
Step-3 Tap Markup: From the editing options, select "Markup" which is represented by a three-dot icon.
- Markup allows you to add shapes, text, and your signature in addition to drawing.
- You can also use Markup to crop and resize your photo.
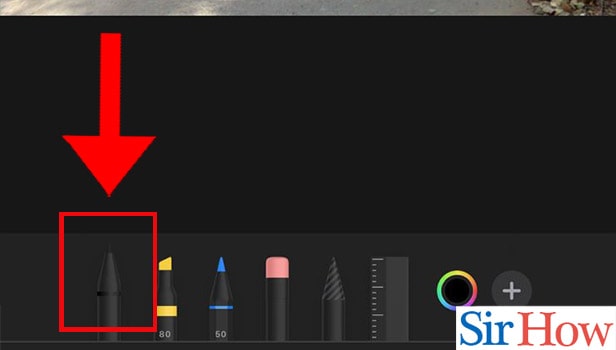
Step-4 Select Pen: In the Markup editor, select the "Pen" tool to begin drawing on your photo.
- You can adjust the thickness and color of your pen by tapping on the circle icon located at the bottom of your screen.
- You can also use the eraser tool to remove any mistakes.
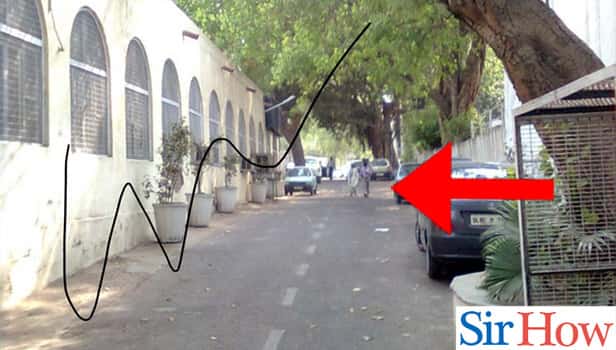
Step-5 Swipe to Draw: Use your finger to draw on your photo. You can also use the pinch-to-zoom gesture to get a closer view of the photo.
- Use a light touch when drawing to avoid making unwanted marks.
- Use multiple colors to add depth and variety to your drawing
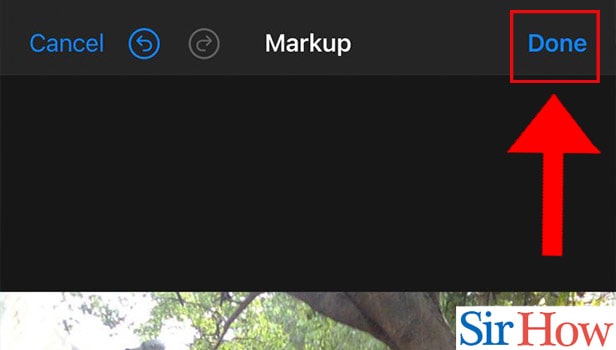
Step-6 Tap Done: Once you have finished drawing on your photo, tap on the "Done" button located in the top left corner of your screen.
- You can undo any changes by tapping on the "Undo" button.
- You can also save your edited photo as a new image by selecting "Save as New Image."
With just a few simple steps, you can easily draw on your photos using your iPhone. Whether you want to add a personal touch or highlight specific details, the Markup tool has everything you need to make your photos stand out.
Tips
- Use different pen colors to add variety to your drawings
- Be sure to use a light touch when drawing to avoid making unwanted marks
- Don't be afraid to experiment with different shapes and sizes when adding text or shapes to your photos.
FAQ
Is Markup available on all iPhone models?
Yes, Markup is available on all iPhone models running iOS 9.0 or later.
Can I use Markup to edit videos?
No, Markup can only be used to edit photos.
Can I use Markup to add filters to my photos?
No, Markup does not have any filter options. You can use the built-in Photos app filters before opening Markup.
Can I use Markup to edit photos that are not in my camera roll?
No, you can only edit photos that are stored in your camera roll.
Can I use Markup to draw on screenshots or images from other apps?
Yes, Markup can be used on screenshots and image
Related Article
- How to Block Someone on WhatsApp on iPhone
- How to Turn Off Read Receipts on WhatsApp on iPhone
- How to Share Location on WhatsApp on iPhone
- How to Uninstall WhatsApp on iPhone
- How to Delete Instagram on iPhone
- How to Change Profile Picture on Instagram on iPhone
- How to Add or Create a Location on Instagram on iPhone
- How to Add Departure Time on Google Maps on iPhone
- How to Change Home Address in Google Maps on iPhone
- How to Find Friends on Instagram on iPhone
- More Articles...