How to Delete Emergency Contacts in Ola
Ola cab booking service aims at providing quality service to its users. This includes ensuring customer safety. Ola offers customers the chance to add emergency numbers to contact in case of any emergency. But there may be a situation where the number you had previously added, is now changed. In such cases, you will have to delete the Emergency contacts in your Ola account. Follow the steps to do so.
Steps to delete Emergency contacts in Ola
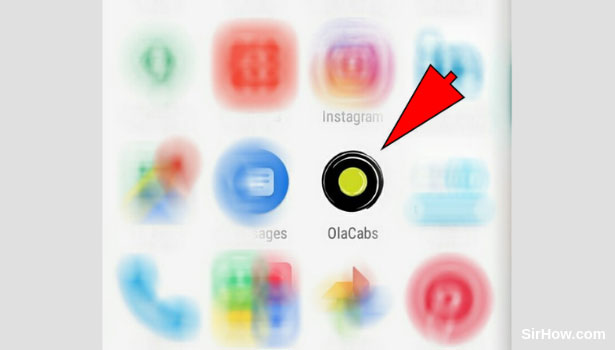
1. Launch the Ola application: The primary step to delete an Emergency contact in Ola is to launch the Ola application. Find the Ola application's trademark yellow and black icon from the app drawer of your phone as shown in the picture below. Tap on the icon once after you find it. As a result, you will open the Ola application.
2. Switch on the device's location: Tapping on the Ola icon to open it, will give you the pop up shown in the picture below. This pop-up is a confirmation message asking you to turn on the device's location. Your device's current location is a crucial requirement for Ola to function. Tap on the OK option shown by the arrow to turn on the Location of your device. 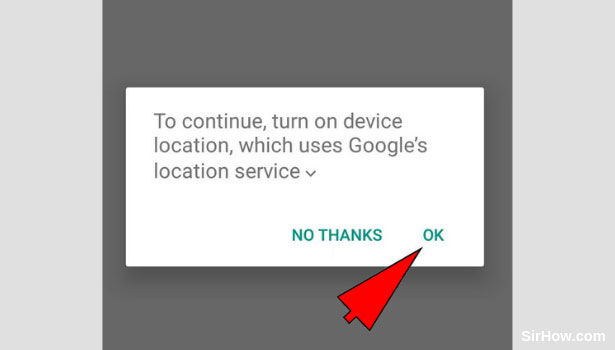
3. Open the menu by tapping the Three-line icon: After you turn on the location of your device, you will be redirected to the home screen of Ola. The home screen has various options including the option of Menu. The three horizontal parallel lines icon shown by the arrow mark represents the Ola menu. Tap on this option once to access various options. 
4. Go to my profile section: As a result of tapping on the three-line icon the menu of Ola will open as shown in the picture below. You will find an option titled "My profile" at the top of this section. It includes all options relating to your profile. Tap on the arrow in front of this option as shown by the arrow. This will take you to the profile section. 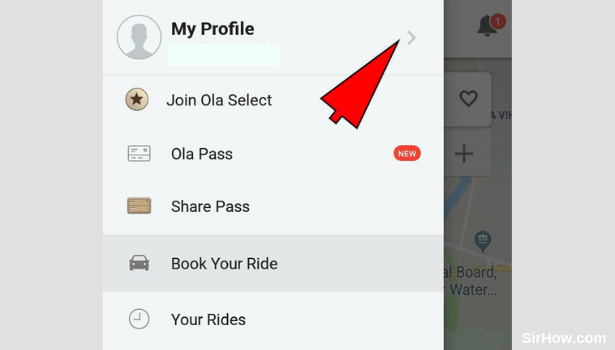
5. Tap on the safety and privacy options: Your Profile options will open up as shown in the picture below. You will find various options regarding your profile, with one of them being the Safety and Privacy option. It is in this option that you will find the Emergency contact feature of Ola. Therefore, you have to tap on the Safety and Privacy option once, as shown by the arrow. 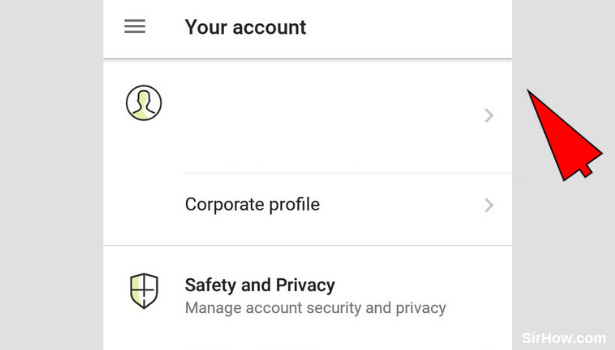
6. Open the Emergency Contacts option: As a result of tapping on the Security and Privacy option, you will further get two more options as shown below. One of these options is Emergency Contacts. In front of this option, you will find a small arrow. Tap on this arrow as shown in the picture to open the emergency contacts option. 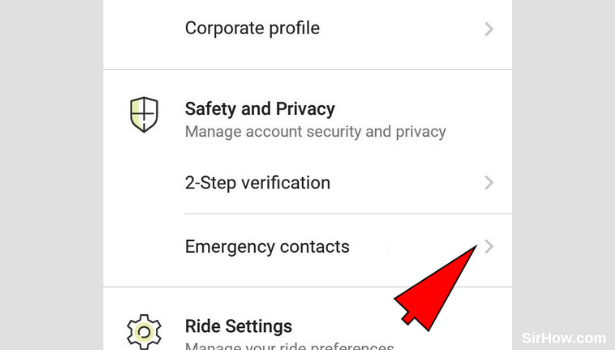
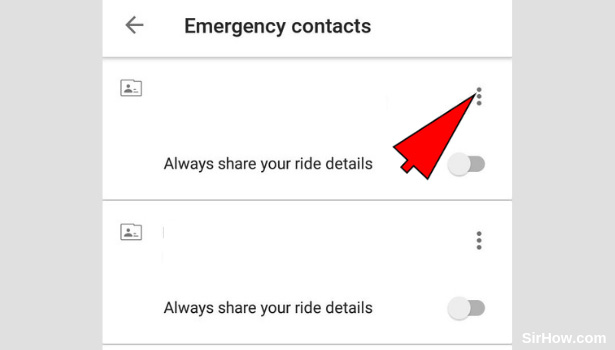
7. Tap on the Three dots option: Once you open the Emergency contacts section, the emergency contacts that you added will be displayed one below the other. In front of each contact, you will find a three dots icon as shown by the arrow. Tap on this three dots icon once to Delete to your emergency contacts in Ola
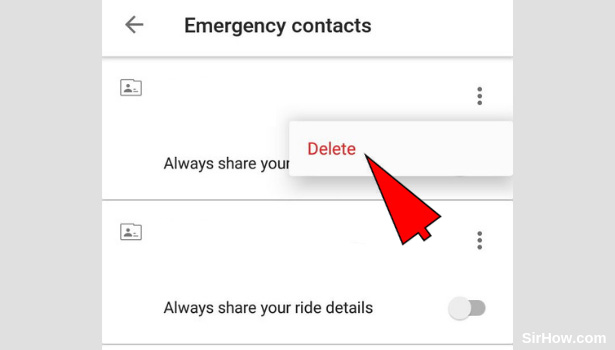
8. Select the Delete option: As a result of tapping on the three dots option, a small pop-up will appear giving you another option titled "Delete". Tapping on this option will delete the selected contact from your Ola account as an Emergency contact. Therefore, tap on the delete option once as shown by the arrow in the picture.
9. Confirm the deletion: After you follow all the steps explained above consequently, the contact you wanted to delete must not appear in the list again. Go through the contacts in the list and make sure that the desired contact is no longer present. Once you have gone through the list and it does not appear, you know you have deleted the emergency contact in your Ola account. 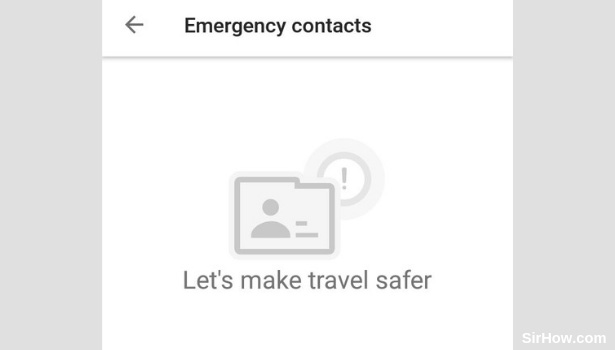
Therefore, any user who wants to delete any Emergency contact in Ola can follow the steps explained in the article above. The procedure is very simple to follow. This is an important feature as there can be cases when a user adds a number by mistake, or the emergency contact added, is no longer in use.
If you want to add another contact after deleting a contact in Ola, follow the steps explained here.