How to Add Grid Spacing in Canva
When you decide to put images in a grid form, you also get to decide the spacing. You can add grid spacing in Canva as per your choice before you share designs in Canva. Canva has the uploads option from which you can upload your images. After that, you can make grids out of them. Like a collage picture of all your memories.
Let us learn to add the spacing you need for your grids by using the Canva application.
Add Grid Spacing in Canva in 8 Steps
Step-1 Open Canva App: With the Canva mobile application, you do not need to open your laptop or PC for every minor design. You can create grids and logos on the go! So, just install the Canva app and get going further.

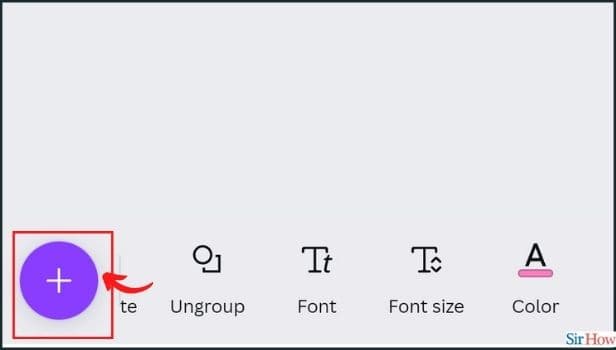
Step-2 Open Design and Tap the Plus Button: If you just want to create a grid, open a blank design template. If you want to add a grid to an existing design, open that specific design. Once the design page is open, click on the plus icon at the bottom of the screen. From there, you can add different things to your design.
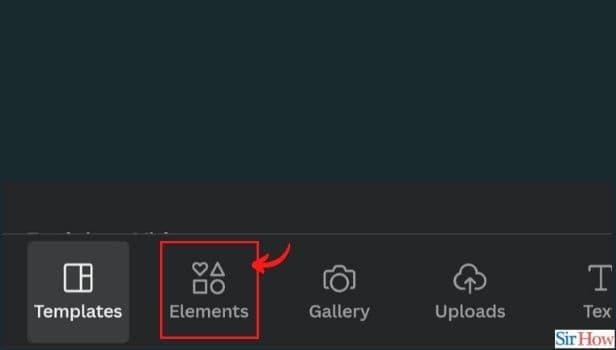
Step-3 Click on Elements: When you click on the plus icon, a window appears with many different things to explore. Grids are one of the elements that you can add in Canva. Thus, click on the element's icon from the bottom of the screen.
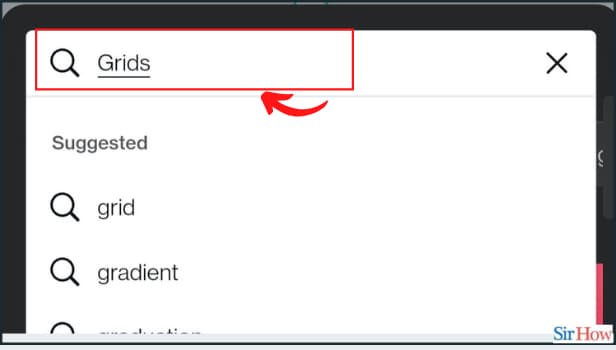
Step-4 Search for Grids: We cannot keep scrolling until we find what we want. It's a waste of time. So, use the search bar on the top and type in grids. Wait for the results to load.
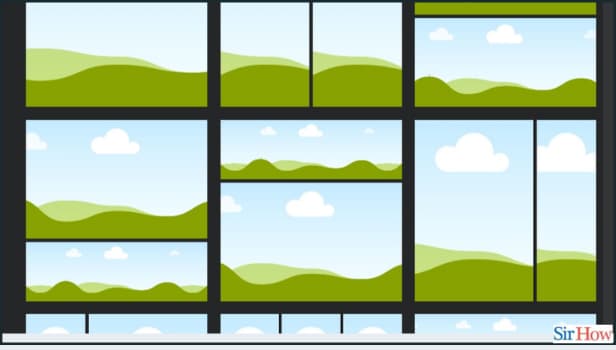
Step-5 The Grids Load: Now, you will see all the grids. Select the one that you wish to use. There are grids for two images to five images and more. Choose according to your needs.
Step-6 Tap the Grid to Edit: Once you select the grid, it will appear on your design page. Now, you need to click on the grid from the design. Like this, the editing options for the grid would open.
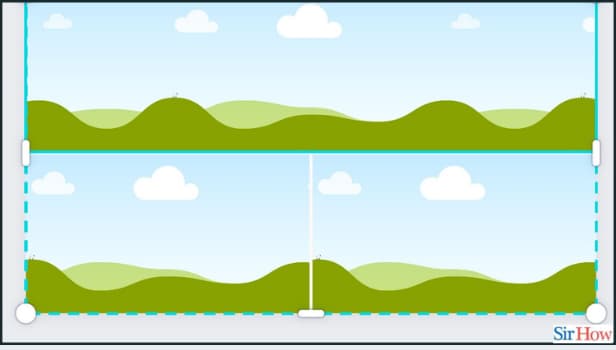
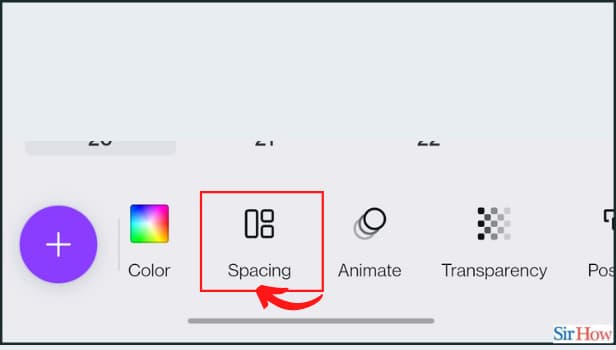
Step-7 Tap Spacing in Toolbar: To add grid spacing in Canva, click on the spacing option from the bottom toolbar. From there, you could add spacing.
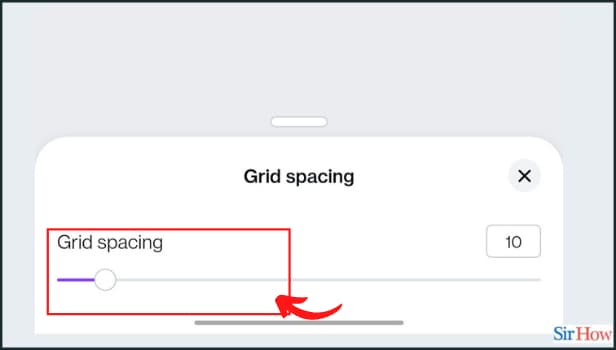
Step-8 Add the Spacing: You can use the slider to increase the grid space or decrease it. When you slide it, see what type of changes appear on the grid. Fix at the one you find promising to you. Thus, you will add the required grid spacing.
What Exactly is Grid Spacing?
The white, blank space that is available between the two images, two frames is the grid space. This is grid spacing. When you want your images to have enough blank space in between, you can increase it. However, if you want your images to be tightly together in the grid, then decrease the spacing.
How Can I Add Images to the Grid?
Once you fix the grid spacing, you can add images. Go to your uploads. Choose the already uploaded image or upload a new image. Select that image. The image will appear on the design. Drag it to the frame you want it to be in. Once you do that, the image will get adjusted inside the frame automatically. You can create a team in Canva to allot others the work of creating the grid.